

Many of us use cPanel as a web hosting control panel, you maybe be using Shared Hosting or a Private server. Well, no doubt cPanel is the best web hosting control to date. If you are a Shared Hosting user you may have a limit on adding multiple domains in cPanel as per the package you are using. If your Hosting Package allows multiple-domain hosting then this tutorial can help to you. In this tutorial, we will cover the process of adding a domain in cPanel with images.
Before we start, make sure you change nameservers of your domain provided by your hosting provider.
Step 1: Log in to cPanel
First of all, you will need to log in to your cPanel account. If you don't have the login credentials of cPanel you can ask your Hosting Provider to provide them.
Step 2: Go to Domains
After login, scroll a bit down, you will see the "Domains" option under the Domains tab.

And on the Domains page, click on the "Create a New Domain" button.

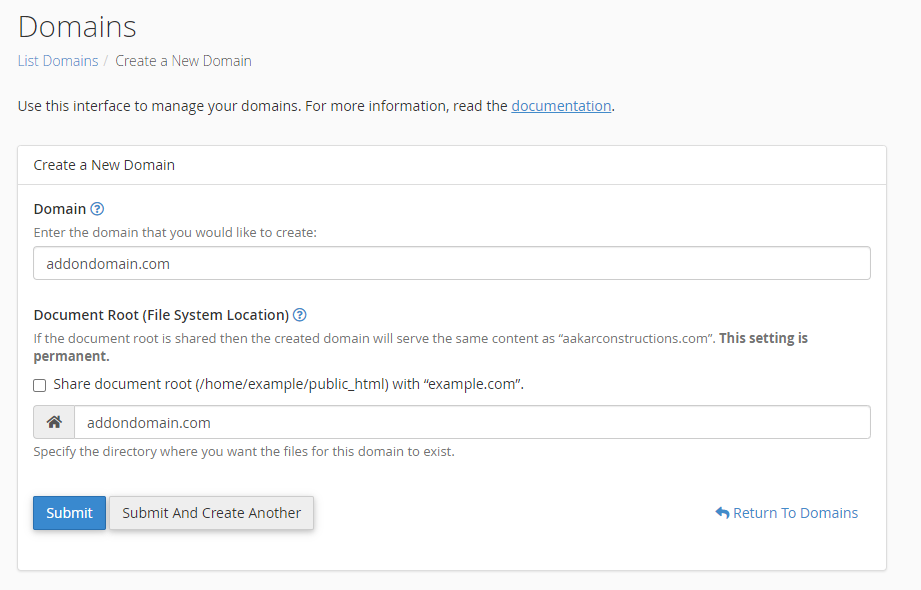
Step 3: Add domain
Now, on the "Create a New Domain" page, you will have to fill domain name, make sure you uncheck the "Share document root" option, which is checked by default.

It should look like below:
Once done, click on submit button and your domain will be added!